Showing posts with label Survivalist 101. Show all posts

Wednesday, December 17, 2014

Mobility and Survival

Survival can be an impossible goal if we place undue burdens on our physical abilities. This is often exemplified by our attempts to carry every possible item of survival gear we own. The result is that we have created a scenario that will make the goal of survival more difficult to achieve. The old saying “Know more. Carry less.” is a good reminder that will help you avoid this problem. Mobility is directly related to your survival.

Mobility is a key factor in many survival situations. It allows you to remove yourself from dangerous and life threatening situations. It allows you to search for needed shelter, food or water. The inability to move can be the start of a process that will ultimately eliminate any chances you may have had for survival.

Our bodies are remarkable things and we often push ourselves to extreme limits even before we become engaged in a survival situation. This is a dangerous approach that should be avoided and physical limitations must be dealt with prior to finding ourselves in a survival situation.

One of the most difficult things to deal with in a survival situation is an injury. It will slow you down or completely stop you in your tracks. Your chances of survival have almost been completely eliminated. There are numerous examples of things that can be avoided to safeguard against this problem.

A prime example of this is the bug out bag. Carrying a heavy pack can lead to knee or back problems that are a creation of our own making. Military personnel have had to deal with this situation throughout history and many a battlefield was littered with abandoned gear when their survival was at stake. Make sure you cut your body some slack and carry a pack that doesn’t push the limits of your physical abilities before its necessary. While a trained soldier may be able to carry 100 pounds of equipment, it could be a deadly burden for someone without the proper physical ability and training. Know more. Carry less.

Another example of dangers to your mobility is caused by the failure to treat simple injuries. A cut on your hand or foot can cause a host of additional problems you won’t need. Take the time to handle cuts, sprains, blisters and other minor injuries as quickly as possible.

You can also adversely affect your mobility by being improperly dressed. A good pair of shoes or boots is of utmost importance. Many people have a hard time walking even a short distance in their bare feet. Imagine what the effects on your mobility would be if you found yourself with bare feet. The same goes for items such as gloves to protect your hands and a good pair of pants to protect your legs. Don’t forget to include a decent shirt and some sort of jacket appropriate for your weather conditions.

Lee Mastroianni of the Office of Naval Research summed it up very appropriately:

“The ability to move is directly related to the ability to survive.”


Staying above the water line!

Riverwalker


Thursday, October 3, 2013

Immersion Hypothermia - Death at Fifty Degrees

There are two basic types of hypothermia that can cause distinct problems in a survival scenario. While exposure hypothermia is the type most people are familiar with, immersion hypothermia can be just as deadly, if not more so. This is because the heat loss from your body is 25 times as great when you are wet. It also doesn't need to be freezing cold outside because it only takes a drop of about twenty degrees in your core body temperature to bring on the first stages of hypothermia.

With fall weather approaching, many streams, rivers and lakes will become considerably cooler and pose a greater risk of hypothermia. Should you find yourself in a position where you should accidentally slip or fall into a body of water that is much cooler than the ambient temperature of the air, you may expose yourself to the risks of hypothermia. Water temperatures of fifty degrees Fahrenheit can quickly put you in a situation where hypothermia may become a very real problem.

When hiking or trekking through wilderness areas, make sure you cross rivers and streams in a safe manner so as to avoid accidentally becoming soaked. Remember also that as little as two feet of swiftly moving water can cause you to lose your footing and get swept away in the current. Some of the other effects of immersion hypothermia are the initial “cold shock” and the failure of muscles in your extremities which can hamper your efforts to swim or remove yourself from the water. Loss of consciousness can soon follow.

If you do become soaked, you need to keep your head above water and get out of the water as soon as possible and start or begin efforts focused on warming your body to raise its core temperature. One of the most immediate dangers of immersion hypothermia is the possibility of drowning. As your body starts to shut down from the effects of hypothermia, there is a real possibility that you could lose consciousness and end up drowning. You can use hand or foot warmers placed in vital body areas such as the neck and shoulders, arm pits and groin area to help speed up the warming process. Your efforts should be focused in increasing your body’s core temperature first.

Using “H. E. L. P,” or the Heat Escape Lessening Posture can also help return your body’s core temperature to more normal levels.   To assume the HELP position, cross your legs so they touch each other as much as possible. Then pull your knees toward your chest, and cross your arms tightly over your chest. The main idea is to assume a posture that allows as much of your body to touch other parts of your body. This will help you retain as much body warmth as possible.

Always try to avoid circumstances that may put you at risk. Even on a relatively warm day the possibility of immersion hypothermia is a very real danger,

Got warming posture?

Staying above the water line!

Riverwalker


Thursday, August 1, 2013

Bushcraft - Central Texas Style - The Artist Conk


The Artist’s Conk (Ganoderma applanatum) is a polypore that ranges in size from a few inches to as much as three feet across. They have a woody, shelf-like appearance with a reddish brown top surface and an underneath (pore surface) that is white and stains to a brown color when marked on or scratched. It gets its name from the fact that the white spore surface can be drawn upon turning it a dark brown color. They are frequently used as a canvas of sorts for artists to render their drawings. They are generally found in clusters on dead or dying hardwoods.


If you need to leave a message for someone, you don’t need a pencil or paper if you have some artist conk in the area. Just scratch a note on the white spore surface.


Often called bracket fungi or shelf mushrooms, this fungus is widely distributed on dead or dying species of oak, elm, and other hardwoods in Texas. Artist conks are perennial and new layers of pores form on the lower surface each year. This give the interior of older artist conks a layered appearance. The interior of the artist conk will also have a velvet like texture.


Artist conks are usually found near ground level which makes them easy to harvest. While this type of conk is normally not considered edible, it does have some other uses that make it valuable. It can be used as a hearth board for starting a fire, burned to repel insects or used as a means to transport a fire when necessary. It can also be boiled as a tea or concoction but this is something I haven’t tried and would advise against.


Unlike tinder conk, artist conk is not a very good tinder material even though it catches fire quite easily when exposed to an open flame. It actually smolders without producing an open flame. If charred, you can get similar results as when using char cloth. Artist conk will smolder for hours and maintain a good set of embers that will allow you take your fire with you.

My preferred use is to repel insects and it works similar to those green coil things sold in stores. Just throw a chunk of artist conk in your fire bowl and you won't have to worry about the insects. This is also a lot better because it’s free.

Got artist conk?

Staying above the water line!


Riverwalker

Saturday, July 6, 2013

Simple Survival Tips - Making Tracks


Many times hiking or wilderness trails are not very well marked. This makes it extremely easy to get off trail and out of sight. While many lost hikers are found within a relatively short distance of the trail or their camp, the process can be a lot simpler if you make some tracks first.

Wildlife doesn’t have the option of having a set of tracks that will distinguish them from one of their own kind. Humans on the other hand wear shoes on their feet that often have a distinct and easily recognizable pattern. This can make you easier to find if you become lost or wander off the trail in the wrong direction.

Merely leave a photo of the tread of whatever hiking shoe or boot you are wearing in your vehicle at the trailhead or back at camp. If you don’t have a photo, make an impression on a sheet of tin foil. You can also simply use some dirt in a box to leave an impression of you tracks. This will make it easier to find you, especially if others have been using the trail.

Along with a message of where you are headed and when you expect to be back, leaving a set of footprints behind will also help if someone needs to find you.

Got tracks?

Staying above the water line!

Riverwalker

Thursday, April 11, 2013

The Well-Dressed Survivalist - Part Four - Ranger Beads


Ranger Beads


Ranger beads were originally developed by military personnel as a means of gauging distances when traveling by foot. Also known as “pace beads”, they are easy to make and can assist you in determining distances that you have traveled. When combined with a good compass, they make an excellent tool to assist hikers or the well-dressed survivalist.

Ranger beads are merely a lanyard (usually made from paracord) that has two sets of beads separated by a knot. The bottom part has nine beads and the top part has five beads. Moving the beads helps you to keep track and calculate the distances you have traveled based on your pace count.

Your “pace count” is determined by how many steps it takes for you to walk 100 meters. For every 100 meters you travel, you simply move one of the nine lower beads up the lanyard. When you have traveled 1000 meters, move one of the five top beads up and pull all of the lower beads back down. This will reset your beads and indicate that you have traveled one kilometer (or “click”). You can measure distances up to five kilometers with a set of ranger beads configured in this manner (see above pic).


You can also visit a friend of mine. Army Ranger Rick at  Survival Outdoor Skills has even more survival tips and tricks for you to check out.

Got ranger beads?

Riverwalker

Sunday, March 17, 2013

Five Rules for Survival


You must be prepared to take any and all actions necessary if you find yourself in a survival situation.  You will need to be prepared to utilize any and all resources in order to insure your survival. Your skills and your knowledge may be put to the ultimate test. This will be a test that you can’t afford to fail.

Five Rules for Survival

Rule #1 - There are no rules. In a survival situation, your actions shouldn’t be bound by arbitrary rules that may exist and be essential to maintain order and stability in normal times. Things are not going to be anywhere close to normal in a survival situation until you’ve managed to get control of your circumstances.

Rule #2 - There is no guarantee of survival. Despite your best efforts, you or a member of your family or group may not survive. You will need to be prepared for this eventuality if it happens. There will still be family members or others in your group that may be depending upon you for help and guidance.

Rule #3 - There is no second chance. You will need to give it your best effort the first time if you want to survive. You probably won’t get a second chance.

Rule #4 - Don’t depend upon luck to save you. Your luck has probably run out if you find yourself in a survival situation. Put your faith in your knowledge and skills to help you survive.

Rule #5 - Never give up. If you give up, you lose the battle for survival. It’s really that simple.

Got rules for survival?

Staying above the water line!

Riverwalker

Sunday, February 10, 2013

Using Your Sixth Sense for Survival


In the world of survival there is a simple truth that reveals itself. Sometimes you have to trust your instincts if you want to survive. Many times it is a matter of how we react to our environment that helps us to survive. If you can learn to trust your “sixth sense”, you may just survive a bad situation before it happens.

Our sixth sense may be due to the fact that our subconscious mind realizes the danger before we are even consciously aware of impending disaster. It may be that we sense things through our subconscious mind that aren’t readily apparent to our conscious mind. Have you ever hesitated at a green light for just a moment only to look up and see a speeding motorist pass in front of where you might have been? You then realize that your hesitation (sixth sense?) prevented a possible accident where you may have been an unwilling victim. Perhaps it may have been a strange sound that caused you to pause your stride for a moment and take a closer look at your surroundings. This simple action may have helped you to avoid a step in the wrong direction that might have led to a dangerous fall or perhaps even stepping in the wrong place on the wrong thing.

Listening to that inner sense that sometimes tells you something is wrong or isn’t quite right is a challenge for all of us. We may often fail to heed those simple “gut feelings” that are trying to tell us something. Our subconscious mind may hear, smell or see things before we are actually aware of the importance of the message our subconscious mind is trying to tell our conscious mind. If we consciously ignore these feelings, we may be risking more than we realize. Trust is a difficult thing to establish in many cases. Learning to trust your “sixth sense” should be a practice that everyone should endeavor to enhance in their daily lives.

Many of us have experienced those moments where a slight hesitation or a simple pause has had a profound effect on our circumstances. We may have averted a probable disaster. It may just be luck is sometimes with us but I don’t want to put too much trust in luck being with me at the right time. I prefer to believe that it is our innate ability to sense danger through our subconscious mind, even before we are consciously aware of the danger that will quite often make the difference in our circumstances and our survival.

An instinctive reaction may be the only thing that saves you.

Got “sixth sense” for survival?

Staying above the water line!

Riverwalker

Tuesday, February 5, 2013

Bushcraft - Central Texas Style - Learning to Hide in Plain Sight


Many times nature is at its best when helping creatures to hide in plain sight. What should be obvious to the eye is not always readily apparent. A little skill in knowing the habits of nature's creatures make them easier to find or avoid. 

One such creature is the Texas spiny lizard. Their coloration allows them to easily blend into their environment but they also maintain a place of safety that is readily accessible should they be discovered. In the case of the Texas spiny lizard, they like to hide in the loose bark of dead trees. All you have to do to discover their presence is peel away the bark to reveal their place of safety.


Here is a closer view of a Texas spiny lizard. They have the ability to remain absolutely motionless, even when exposed to help prevent their presence being revealed. They can also swiftly retreat to a different place of safety when their hiding place has been discovered.

Nature teaches many valuable lessons if you pay close attention to your environment.

Got natural survival lessons?

Staying above the water line!

Riverwalker


Friday, January 4, 2013

Training for Survival - Avoiding the Popsicle Syndrome


When faced with a survival situation, the stress that occurs can cause a wide variety of reactions in people. A proper response to a survival situation can be achieved with the proper training and preparation. Quite often people react to the immediate stress of a survival situation with inaction. They will literally find themselves frozen in place and unable to take the necessary actions that may be needed to help them survive. They have literally fallen victim to the “Popsicle Syndrome”. They will suddenly be unable to take the required measures to allow them to effectively react to a survival situation.

Training drills are an effective way to help combat this problem. With the proper training, you won’t suffer from the information overload that can cause you to stress out to the point where you are suddenly “frozen in place” and unable to react. You need to train your brain to react in a positive manner when confronted with difficult situations. A lack of inaction on your point can decrease your chances for survival.

When conducting emergency drills at work, it is not uncommon for persons in my charge to literally freeze up. The flashing lights and warning sirens may not even be enough to shake them out of their stupor. They stand there like a test dummy and may not even react when confronted by someone else who is trying to get them to respond to the threat. If they were on a sinking ship, they quite literally wouldn’t be able to don a lifejacket...even though it could mean the difference in their ability to survive.

Training will enable you to take the proper and necessary action in a survival situation and it will be a key factor in your ability to survive. You will not only be able to recognize what needs to be done but you will have the ability to get it done. Being prepared to face a threat by properly training your mind and your body to respond accordingly will give you a definite advantage in a survival situation.

You don’t want to be a “popsicle” when things start to heat up.

Got training?

Staying above the water line!

Riverwalker


Monday, October 29, 2012

The Well-Dressed Survivalist - Part One


Every well-dressed survivalist knows the importance of proper headwear. Whether it’s to conserve heat loss in the winter or to keep you from frying your brain in the summer, the proper headwear can make a big difference. There are numerous hats and caps that are available to provide the proper protection. It could be anything from a straw hat to a wool cap. The important thing to remember is that no well-dressed survivalist goes anywhere without some form of head covering for protection. A decent head cover can also provide the opportunity to carry some extra gear such as cordage or fishing gear for use in an emergency.

Got “boonie” hat?

Staying above the water line!

Riverwalker

Sunday, October 21, 2012

Simple Survival Tips -The Exit Strategy


An exit strategy  is the means by which you can achieve your goals by lessening the risk presented by a variety of different situations and limiting the possibility of your objective having a cost that may be in excess of your desired goal.

An exit strategy has two main goals. These goals are to keep the loss of lives or injuries to a minimum and to conserve the maximum amount of your available resources. An exit strategy should be included as a part of your emergency plans to give you the maximum chances for survival.

Many people are quite familiar with the term “bugging out” but may not realize the most efficient way to decide if this is your best and most viable option. This is where having an exit strategy will be of the most value depending upon the severity of the current situation.

Now if you’re looking at the possibility being in water over your head due to rising flood waters your obvious goal is to minimize the possibility of drowning by “bugging out”. This may solve one of the goals of an exit strategy (i.e., the loss of life), but it won’t solve the problem of the resulting loss of available resources that may occur. Your emergency planning should take such a possibility into account and provide for this contingency.

While the first goal of an exit strategy will always be to minimize the loss of life or injury, it’s important to make plans that will enable you to satisfy both goals. Certain resources, such as food, water and shelter, will be just as necessary for you to achieve the first goal of an exit strategy. You won’t solve the problem if you live just long enough to die from exposure to the elements, dehydration or starvation from the lack of food.

It is extremely difficult to plan for every possibility that might endanger your survival. Including an exit strategy in your planning can give you a definite advantage in order to achieve your goal of survival.

Got exit strategy?

Staying above the water line!

Riverwalker


Tuesday, September 4, 2012

Survival Kit Gear Test - Will It Float?


Testing your survival gear is crucial when you want to make sure your gear will perform as needed. Usually, a small amount of effort and a little time on your part is all that is needed. This test was done in response to a reader who asked if the survival kit would float since it weighed approximately a pound. This was a fair question since wet gear can really ruin your day. Here are the results of the survival kit gear test.

After the test was completed, a check of all the contents showed there was no moisture present in the container after being floated and submerged. 

1.The survival kit was dropped into the tub of water from a height of about four feet.

2. The survival kit was left floating for approximately 15 minutes.

3. The survival kit was left submerged for approximately 15 minutes.

4. The contents of the survival kit were not heavy enough to sink the container.

5. All contents of the survival kit were high and dry after the test was completed.


This is a close-up view of the survival kit with all its contents floating in a tub of water. 

This answers the question...will it float? YES.

Reader Tip: Do not tie your survival kit to your boat anchor unless you want to hide it! 


The picture above shows the survival kit floating in a tub of water.


The picture above shows a view of the survival kit submerged in a tub of water for our gear test.


This answers the question....is it waterproof? YES.


The survival kit had to be weighted down with a large rock in order to get it submerged in the water. It was left there for several minutes and a check of the contents showed everything in the kit was still dry.

Reader Tip: If you don't have a large rock, you can use a boat anchor to weigh it down. This will allow you to hide your survival kit and thus make it a "Stealth" survival kit. 


Is your survival kit....

Staying above the water line?

Riverwalker

Thursday, August 30, 2012

DIY Survival Gear - How to Make a Portable SODIS Device


Portable SODIS Device


When it comes down to your survival, sometimes you not only have to think outside the box but you may need to use the box itself. There are many critical situations you may find yourself in during a crisis or an emergency. There is one that ranks higher up the list than others. This is the need for safe drinking water. No matter where you are or what your circumstances you will always need a safe and clean source of water for drinking. Unfortunately, you may not always have the ability or means to purify a source of water for drinking. Here is a simple gear set-up that gives you an alternate means to disinfect your water that doesn’t involve chemicals or fire and can make it relatively safe to consume.

SODIS is the disinfection (**edit) of water by using the power of the sun. There is a simple SODIS device that can be easily made, carried in your backpack, requires a minimum of space and weighs next to nothing.

Here’s what you will need to make a simple SODIS device for disinfecting water in an emergency.


First we need to think “flat”. This usually amounts to less room and less weight when it comes to gear. The traditional SODIS method usually involves a round plastic bottle. So to save space because round takes up more room we will use a bag instead. A large bag can be folded and stored flat and will take up a lot less room. For this project and for the sake of simplicity, we will use a plastic freezer bag. This is an everyday item that everyone generally keeps handy in the kitchen.

While still thinking “flat”, the next item you will need is a dark-colored bandanna or a piece of black cloth or material. This dark cloth needs to be at least as large as the plastic bag you will be using.

The third item you will need is a piece of cardboard from a box that is just slightly smaller than your bag. This will make storing the pieces of your SODIS device easier. This cardboard will be used to help us make a solar reflector.

The last item you will need is a sheet of heavy duty tin foil. This needs to be large enough to cover the entire piece of cardboard. This will be our solar reflector.


Bag Filled with Water


To use the device simply put your filtered water in the bag (you can also use the bandanna to filter your water). Fill the bag approximately half full of water and then work to eliminate as much air as possible out of the bag. When laid flat, the bag with the water should be about the thickness of your hand. By doing this there will be better penetration of the sun’s UV rays. Make sure to lay your bag in a bright sun-lit area for at least six hours. It also helps to place your bag of water on a dark surface such as a bandanna or piece of cloth. This will aid in heating the water. It can be folded when not in use and kept inside the bag. It can then be easily stored in the bottom of your pack, under the seat of your vehicle or you could even make a smaller version that could fit in your pocket. If you don’t have plenty of sunlight, it may require an additional day to treat the water. If it looks like it might rain, you may want to keep a bucket handy to catch some rainwater. 


You might also want to include an extra bag as a container to retrieve water in or if your original bag develops a hole. Otherwise, you're going to need some duct tape to patch the hole.

Special Notes:


1. SODIS is not as reliable as distillation, boiling or chlorination for treating drinking water.

2. Using the SODIS method is better than drinking untreated water.

3. The SODIS method can be relied on to inactivate bacteria only on sunny days.

4. The water being treated must be adequately filtered before treatment to reduce turbidity.

5. Solar disinfection of drinking water should not be your primary means of treating water for consumption.


One of the best parts of this DIY survival gear is that it can be readily made from simple household items that can be found in almost everyone’s home.

Got portable SODIS?

Staying above the water line!

Riverwalker

Note from RW: Post was edited to correct terminology. Thank you.

DIY Survival Kit Mods - Adding a Lanyard


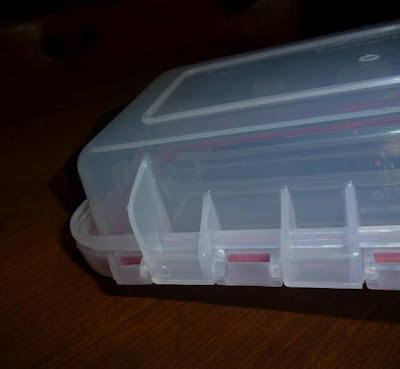
In DIY Survival Gear - Building a Survival Kit - Part One, a reader made a comment on how to add a lanyard to your survival kit when using the small waterproof containers. The picture above shows a survival kit container, as used in my series on building a survival kit, with a lanyard attached.

Here is his comment:

Ed said...

"There are sort of finlike protrusions near the hinges on the back; I made holes in those with a soldering iron, so I can put a loop of paracord on it and cow-hitch it to the thwart on my canoe, a belt loop, whatever. Could do the same with a drill but my guess is melting the hole would stress the plastic less than drilling a hole the same size.

Of course, you could drill a much smaller hole and use thinner cord, wire, whatever. "

To make it easier for those wishing to make this gear mod to their survival kit, here is a pictorial of Ed's suggestion for adding a lanyard.


The  picture above shows the fin-like protrusion on the case where you can drill a hole to attach a lanyard.


The picture above shows the fin-like protrusion after the lanyard hole has been drilled.


The picture above shows a lanyard secured to the survival kit container with a simple overhand knot.

This gear mod does not affect the structural integrity of the case and is a simple modification that most anyone can make. Just exercise a little caution and don't make the hole too large.

Thanks go out to Ed for a great gear mod that was very simple to accomplish.

Got DIY Survival Kit Mod?


Staying above the water line!

Riverwalker


Wednesday, August 22, 2012

DIY Survival Gear - Building a Survival Kit - Part Eight


In Building a Survival Kit - Part Seven, first aid items in the form of band-aids and alcohol wipes were added to our survival kit. The final item will now be added to our survival kit.  This final item will give us the ability to seek out help if necessary for our survival. With this final addition, our goal of building a quality survival kit is now completed and ready for our use.


The final gear item that will be added to our survival kit is a compass. In the majority of cases, you will almost certainly be better off to wait for someone to find you when you become lost. Otherwise, you will find yourself walking in circles and going nowhere fast. You may even be decreasing your chances of being found by continued movement. Try to avoid those small button compasses as they are not always accurate or reliable.


There may be times when it is necessary for you to travel and without a compass this can be a difficult task to accomplish. You could even wind up making your situation worse than it originally was before you started out. You will also want to make sure you read and understand the directions for the use of your compass. This final gear item adds $ 5.00 to the cost and approximately one ounce of additional weight to our survival kit.


After being weighed, the weight of this kit now stands at 16 oz.  It also has a cost of slightly less than $ 40.00 when the exact amounts were calculated. The cost could be even lower if you use some gear items you may already have at home.

Here are some of my final thoughts on a survival kit:

1. This is not a cheap survival kit. Cheap gear may get you killed because it may fail you at the worst possible moment.

2. There is no food in this survival kit. You can go several days without food before you are at risk. If you want food, carry a lunch box!

3. There are only minimal first aid items in this kit. If you think you’ll need more, carry a small first aid kit in addition to your survival kit.

4. You should always carry plenty of water with you or a means to obtain water that is separate from your survival kit (water bottle, hydration pack, personal water filter). You can still survive if you lose your survival kit but you can’t survive without water.

5. A good survival kit is worthless if you don’t keep it handy (purse, glove box, console, fanny pack, day pack or whatever). If you’re going on a hike or going to be gone for an extended period of time, make sure to take it and keep it with you.

6. A good survival kit is useless if you don’t know how to use its contents. Make sure you are familiar with the gear items in your kit and the proper manner for their use.

7. A good survival kit is for your personal use and the use of your family. Don’t be afraid to make changes to accommodate your needs and the needs of your family.

8. Always check your gear items periodically to make sure they are still functioning properly.

9. Increase your knowledge base as much as possible to minimize your need for survival gear. 

10. Know more, carry less.


Don’t forget to leave a comment. Thanks.


Got DIY Survival Kit ?


Staying above the water line!


Riverwalker


DIY Survival Gear - Building a Survival Kit - Part Seven - First Aid


In Building a Survival Kit - Part Six, a mini-tool and a small knife were added to our survival kit. This gave us some basic tools to complete a number of different tasks that could make a difference in our ability to survive during a crisis. These items gave us the ability to accomplish small tasks that may have been impossible to achieve using only our hands. As we move towards our goal of building a quality survival kit, it may need to be modified to match your skill levels and goals.


The next gear item that will be added to our survival kit is a few band-aids. These will be useful for small cuts or scrapes only. More serious injuries will require more drastic measures to insure your survival. Hopefully, a blister from walking will be the worst that happens. Remember, if you do have to use a band-aid, save the paper wrapper. It makes excellent tinder if you need to start a fire. This gear item and the next one add $ 1.00 to the cost and add no additional weight to our survival kit.


The other gear item for first aid that will be added to our survival kit is a couple of alcohol wipes. The risk of infection can be minimized if a wound is properly cleaned. Remember, that even a small injury can cause serious and life-threatening problems if it becomes infected. Here too, you will want to save your used alcohol wipes. They also make excellent tinder for starting a fire. Both items were put in a small zip-lock bag and placed in the bottom of our survival kit.

In a survival situation, you will need to remember that a small survival kit isn’t designed to replace a good first aid kit. The survival kit’s purpose is to help you survive the little things that can make your life miserable while you are waiting for help, rescue or are in the process of finding your way back. Each situation will be different and having a few basic items may mean the difference in your survival.

Here is a current summary of the contents of our survival kit:

Gear Item                                    Cost                            Weight

Container                                      $5.00                           5 oz.

Mirror                                            $3.00                           1 oz.

Whistle                                          $2.00                          1 oz.

LED Flashlight                              $1.00                           1 oz.

Sewing Kit                                     $1.00                          1 oz.

Cordage                                        $1.00                          1 oz.
                                                  
Mini Bic Lighter                             $ .50                           1 oz.

Magnesium Firestarter                  $4.50                          2 oz.

Dust Mask                                     $1.50                          0 oz.                                                         

Mini-Tool                                      $5.50                           2 oz 

Knife                                            $12.00                         1 oz

First Aid Items                             $1.00                           0 oz
                                                    _____                       ______

Totals                                           $38.00                      17 oz.


Don’t forget to leave a comment. Thanks.


Got DIY Survival Kit ?


Staying above the water line!


Riverwalker


Tuesday, August 21, 2012

DIY Survival Gear - Building a Survival Kit - Part Six - Tools


In Building a Survival Kit - Part Five, a dust mask was added to our survival kit. This was to give us a small measure of protection from air-borne contaminants and a means of emergency water filtration. This item created at least two other options for our survival. This time we will give our survival kit true versatility by adding a couple of quality  tools to our survival kit. Once again, our goal continues to be building a quality survival kit.


The ninth gear item that will be added to our survival kit is a small mini-tool. This mini-tool will enable us to make simple repairs or give us access to areas that might otherwise be impassable without the aid of a few simple tools. While this mini-tool won’t take the place of a regular size tool box, it will give us a few additional options for our survival. This simple mini-tool can enable a number of small tasks to be completed efficiently and effectively and can be found in the fishing dept. at your local big box store. They are made of stainless steel and are generally quite reliable. This gear item adds $ 5.50 to the cost and adds approximately 2 ounces of additional weight to our survival kit.


The tenth gear item that will be added to our survival kit will be a small, high quality knife. A knife is one of the most important tools that you can carry to aid you in a survival situation. The knife chosen for our survival kit will be a Gerber STL 2.0. This is a frame-lock design with a titanium coating and is extremely durable, compact and lightweight. This adds $12.00 to the cost but only one ounce to the weight of the survival kit.

In a survival situation, you will almost certainly require a few simple tools to accomplish a variety of minor tasks. These tasks could be almost impossible to complete otherwise. While the mini-tool may have more value in an urban setting, it can also be valuable in a wilderness setting and a good knife will be invaluable in any survival situation. Each survival situation comes with its own unique set of problems and having some basic tools available will hopefully make these problems easier to solve.

Here is a current summary of the contents of our survival kit:

Gear Item                                    Cost                            Weight

Container                                      $5.00                           5 oz.

Mirror                                            $3.00                           1 oz.

Whistle                                          $2.00                          1 oz.

LED Flashlight                              $1.00                           1 oz.

Sewing Kit                                     $1.00                          1 oz.

Cordage                                        $1.00                          1 oz.
                                                  
Mini Bic Lighter                             $ .50                           1 oz.

Magnesium Firestarter                $4.50                           2 oz.

Dust Mask                                     $1.50                           0 oz.                                                         

Mini-Tool                                      $5.50                            2 oz 

Knife                                            $12.00                           1 oz
                                                     _____                       ______

Totals                                           $37.00                         16 oz.

Don’t forget to leave a comment. Thanks.


Got DIY Survival Kit ?


Staying above the water line!


Riverwalker

Related Posts with Thumbnails