Showing posts with label Repairs. Show all posts

Sunday, September 9, 2012

Air Rifle Maintenance - Installing a Breech Seal on a B3 Air Rifle


The maintenance of your gear should be an essential part of your daily routine. While the majority of repairs can be outside the expertise of the average person or require specialized tools, there are a few minor repairs that can be done to your equipment to keep it in the best operating condition possible. One of the simplest and easiest repairs that can be done to a B3 air rifle is installing a new breech seal. This will also help to keep it performing properly.


The first thing you will need to do is order new breech seals if you don’t have any in stock. My breech seals were ordered from Archer Air Guns and arrived in a very timely fashion. They were also decently priced and the shipping costs were reasonable. The price of an individual breech seal figured out to be only a $1.75 each. The breech seals came in a package of six for $6.99. Two packages were ordered since the breech seals in both my B3 air rifles will be replaced and only two are required (one for each rifle). The remaining breech seals will be kept for spares.


Next make sure your air rifle is unloaded. Then, use the lever located under the barrel to cock the rifle and expose the breech seal. Once the breech seal has been exposed, you will then be able to access it so that it can be replaced. The breech seal will get hard and brittle after a while and will affect the power of your B3 rifle if not replaced on a fairly regular basis. A package of six breech seals should cover your replacement needs for several years of regular use of your B3.


Once you’ve located the breech seal, use a screw driver or similar object to pry the old breech seal out. Once you have the old breech seal out, make sure to get all the old pieces of seal out and clean the chamber before replacing the seal.


The new breech seal can be easily installed by hand and then the firing chamber can be closed to set the breech seal. Total time for this simple repair is less than five minutes and will keep the power of your B3 at a respectable level.

These air rifles can often be found at a relatively low cost at yard and garage sales. Many times these air rifles are being sold simply because they have lost power. In most cases, these air rifles only need to have their breech seal replaced to restore their original power levels.

Got maintenance power?

Staying above the water line!

Riverwalker


Sunday, September 2, 2012

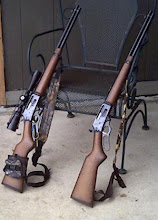
Shooting After Surgery - Mounting a Scope on a B3 Air Rifle


There hasn’t been an opportunity to do much shooting after my surgery. The doctor said to pretty much forget about using the twelve gauge shotgun, the M&P 15 or my Mosin-Nagant for a while. That left my choices fairly limited. It was time to drag out the springer for a little shooting practice.


I recently picked up a little 4x air rifle scope (Tasco) at the big box store and decided to mount it on one of my springers. At a cost of $5 (it was clearance priced), I figured this might make a nice addition to my springer. It might even help an old guy with bad eyesight actually hit the target. Cheap scope on a cheap gun makes a good combination for my pocketbook.

There’s not a whole lot of expertise required for mounting a small scope on an air rifle. Just line the mounts up on the grooves in the receiver and tighten them down after checking for proper eye relief. Then shoot a few rounds and make the necessary windage and elevation adjustments till you can hit center target. 


I also took the time to change out the breech seal. This one was in pretty bad shape and I wanted to get the power of this air gun back up to speed. The breech seal will go bad after a while and the power of your air rifle will be significantly diminished if not replaced. I’ll cover that aspect in another post later. Many times you can pick up these B3 springers at garage or yard sales for $40 or less. Usually the only thing wrong with them is the breech seal has gone bad.


Shooting from a kneeling position and a standing position at a fifty yard target (the distance to my trash cans), the pellets were hitting off to the left. After some adjustment, I got four pellets to pretty much hit center mass. Then to double check everything, I put up a new target and shot a few more rounds. Everything still looked good.

If I see another possum digging in my trash, he better watch out!

Got springer with a scope?

Staying above the water line!

Riverwalker

Monday, September 12, 2011

Tools for Survival - The Multi-Tool


While there are a lot of items that many people include as part of their survival gear, there are few that can match the usefulness of a good multi-tool. A good multi-tool is capable of performing a wide variety of tasks and functions and is available with a wide range of different tools that can serve as a tool box for your pocket.

Multi-tools come in a wide variety of sizes. Smaller versions are easily included in a personal survival kit or they can be simply carried in your pocket. Larger versions usually include a belt pouch which also make them easy to carry and readily accessible when needed.

Multi-tools also come with numerous configurations to fit most any need. Most come with a standard variety of tools that will get the job done. The most common tools included in a multi-tool include such things as pliers with wire cutting ability, a pair of folding scissors, one or two knife blades, a saw blade, a file, a can opener and different screwdrivers.

Versatility and usefulness in a wide variety of situations and circumstances and sizes to fit most any task makes the multi-tool a “must have” item for your survival gear.

Staying above the water line!

Riverwalker

Monday, February 7, 2011

Riverwalker's Pics - Maintenance Required


Sometimes a little maintenance is required on your gear and equipment to keep things going.

Got maintenance?

Riverwalker

Thursday, August 5, 2010

Update on Storm Damage - Getting Back to Normal

The roof repairs are fairly complete now except for a little painting that will hopefully get done this weekend. My plans are always subject to change though because you never really know what will happen next. Still have some downed tree limbs to clean up but things are getting back to normal fairly quickly. A big factor in this was due to having an emergency fund. It's nice when you can make needed repairs without having to worry about where to get the money to pay for those repairs.

Staying above the water line!

Riverwalker

Saturday, July 31, 2010

Storm Damage - Ripped by a Texas Thunder Boomer

What little spare time that's left over while working a full-time job and two part-time jobs has just been used up. We had a recent Central Texas thunder boomer and the high winds ripped up the roof on my garage. The repairs have been started but are sure eating up my free time. My posts may be sporadic for a while due to having to make some necessary repairs. There goes a big chunk of my emergency fund!


We had some of the normal tree damage also that comes along with the stormy weather and now it's time to drag out the chainsaw and go to work.


Got a big limb touching the ground also that will need to be removed. There was a funnel cloud sighted in my area but don't really know if that was the problem here. Probably just some straight line wind damage.

Got some additional bushcraft posts planned but will need to work on those after the repairs are completed.

Staying above the water line!

Riverwalker

Monday, May 3, 2010

DIY Gear Repair - How to Fix a Tarp with a Rock

Being able to make field expedient repairs to your gear is a necessary survival skill. One of the pieces of gear that can cause problems is your tarps. There is a simple way to fix one of the more common problems that occur with tarps. Realizing that shelter is always one of the first priorities in a survival situation makes knowing how to repair this common problem a good way to make your survival a little easier.

Tarps are great for making a shelter but the grommets that are located on the corners and along the edges sometimes fail. In order to keep your tarp from tearing when tying it off or due to high winds, etc. there is a simple fix for the problem. Use a rock!

Wrap the corner or edge of your tarp where the grommet has busted out or is missing around a rock and then tie it off with rope or paracord. It will actually hold better than the original grommet would have secured it. Don't have any rope or paracord? Just use a bigger rock to weigh the edge of your tarp down!

Got busted tarp? Get a rock!

Staying above the water line!

Riverwalker


Related Posts with Thumbnails